
Sometimes, your wardrobe needs just that little pop of Liberty! We have had a ton of fun making these super-speedy no-sew bow barrettes - they're quick, they're adorable, and they're easy enough to make with all-ages! Use fabric from your stash or select from an array of beautiful 5-inch charm squares. You can match a bow to any outfit you dream up!

Betsy Charm Squares
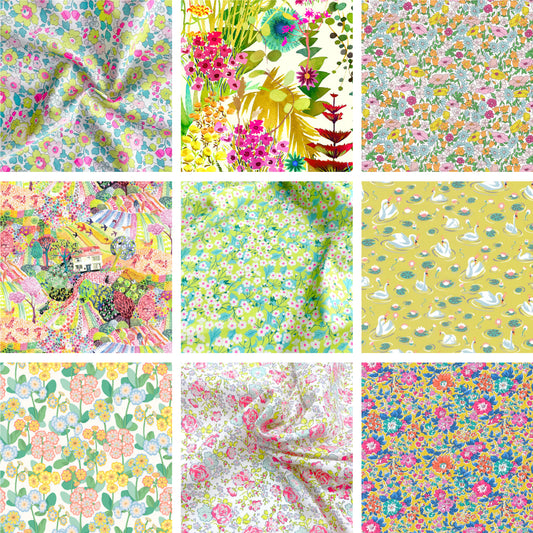
Chartreuse Charm Squares
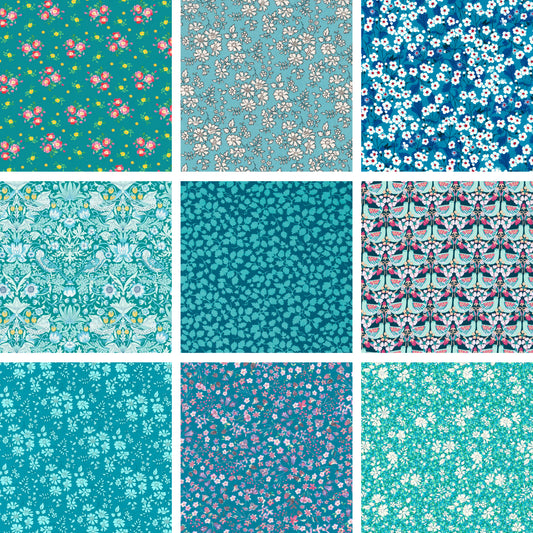
Teal Charm Squares
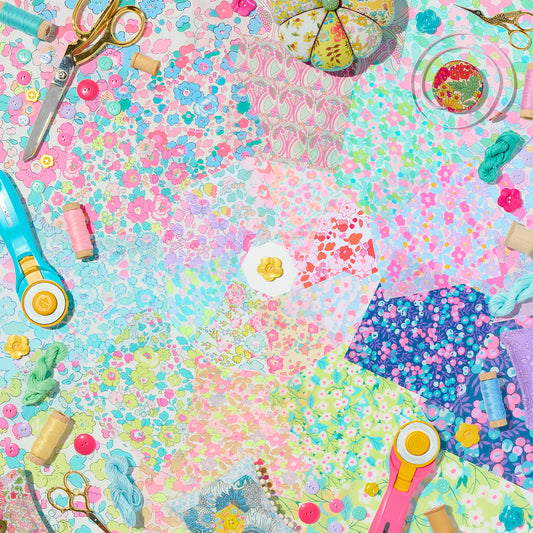
Neon Charm Squares

Pink Charm Squares
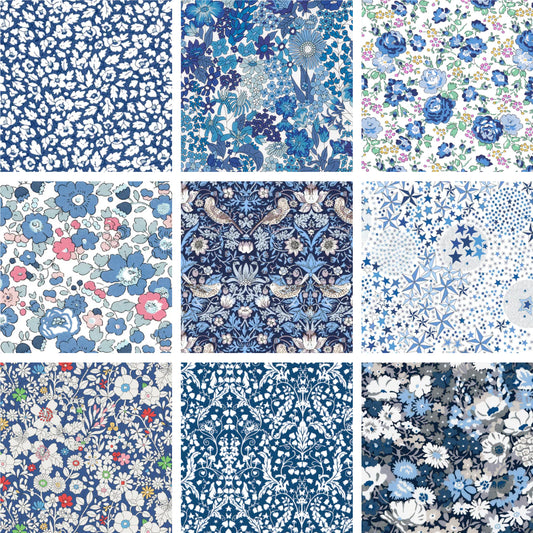
Blue Charm Squares
Project Supplies
- 5" x 5" Fabric square
- Double-sided permanent fabric adhesive sheets (such as Peel n Stick Fabric Fuse in 4-1/4" x 5" sheets)
- Coordinating embroidery floss, at least 15"
- 1-3/4" Alligator hair clip
- Cutting mat
- Rotary cutter
- Ruler
- Scissors
Step by Step Instructions
Step 1: Prepping Your Fabric and Tape
a) Cut your selected fabric(s) to 5 inches x 5 inches. Our 5-inch charm squares are perfectly sized for making bows.
b) For each bow, cut two pieces of tape from your double-sided adhesive sheets. The strips of tape should measure:
c) Lastly, cut one 15-inch length of embroidery floss per bow.

Step 2: Folding and Taping Your Fabric
a) Place your fabric square wrong side up. Take one edge of your fabric and fold your square in half with wrong sides facing. Finger press to create a center crease. Unfold, keeping your fabric wrong side up.
b) Next, take the ends of the fabric that are parallel to the center crease and fold each
to the center, then finger press. Again, unfold and keep your fabric wrong side up. 

c) Take the longer of your double-sided tape strips (3/4 inch x 2-1/2 inches) and remove the paper backing from one side only. With the exposed adhesive facing the wrong side of your fabric, center the tape along the center crease and press firmly to secure.
d) Remove the paper backing from the adhered piece of tape. Following your creases, take one end of your fabric and fold to the center crease. Press firmly to secure the fabric to that half of the tape. Repeat with the other end of your fabric. Keep the folded side of your fabric facing up.

e) Now, working with the unfolded (raw edges) of your fabric, fold your fabric in half. Finger press to create a center crease. Unfold, keeping the folded side of your fabric facing up. 
f) Take the raw edges of your fabric and fold each edge to the center crease, then finger press. Again, unfold and keep the folded side of your fabric facing up.

g) Take your shorter strip of tape (3/4 inch x 2-1/4 inches) and remove the paper backing from one side only. With the exposed adhesive facing the folded side of your fabric, center the tape along the center crease. Press firmly to secure.
h) Remove the paper backing from your adhered piece of tape. Following your creases, take each of the raw edges of your fabric and fold to the center crease. Press firmly to secure the fabric to the tape. 

Step 3: The Accordion Fold
To form your bow, you will make a series of accordion folds. The folds will alternate from the front to the back of your fabric.
a) Lay your fabric square with the seam side visible and running vertically. 
b) You will fold your fabric by sixths to make your bow (so each half of your square will have 3 sections and 2 folds).
c) Start by folding Section A (the bottom 1/6 of your fabric) over Section B. Press the fold with your fingers and hold it securely.
d) Next, fold Section B under Section C. Continue folding, alternating each section over and under until your fabric resembles an accordion.


Step 4: Winding the Floss and Finishing
a) Take the center of your fabric accordion between your fingers, with the finished side of the bow facing up. That is, the taped seam should not be visible.

b) Take your floss, leaving a 3-inch tail, and start winding it snuggly around the middle 3/8-inch of your folded bow. Work from one side to the other, then double back so that you end where you started. You should leave at least 3 inches of floss to tie off.


c) Turn your bow so that the bottom or unfinished side is facing up. Tie the floss ends tightly in a double knot. Trim the floss ends to 1/4 inch.


d) Hold your bow with the bottom side facing up. Slide the flat "jaw" of your alligator clip slowly along the middle fold of your bow, and under the wound embroidery floss. Be careful not to knick the floss or poke the end of the clip through the taped portion of your fabric. Adjust the bow to your liking.


Just a little hair love!


