
Stylish and eco-friendly, beeswax wraps are a great alternative to plastic. Cover a jar or bowl for airtight storage, create a pouch for snacks, or wrap up a loaf of bread. Beeswax wraps have a variety of usages, in and outside the kitchen, and also make great gifts. This No Sew Project requires some preparation on the front end, but the process is straightforward and the results are, well, bee-utiful. Color code wraps for each member of your family or by food group with our colorful stash packs. You can also add a bit of whimsy to your beeswax wraps with an assortment of adorable animals and characters. Have fun with this project and bee kind to the planet!
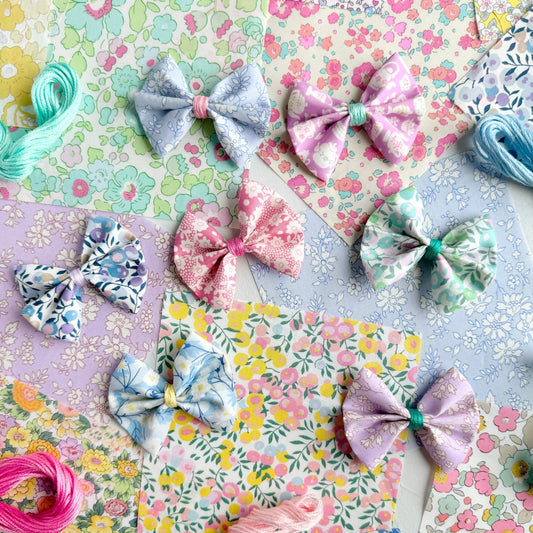
Animal Pals (B)
Odette (A)
Pattern Safari (D)

Gallymoggers Reynard (B) 2026
Catnap (A)

My Little Pace (C)

Peter Woodward (X)
Fabric Requirements
Fabrics made of 100% cotton are an ideal choice for food wraps. Select your favorite prints or designate different colors or themes for different uses or users. Keep in mind that beeswax has a slight hue so fabrics will darken once the wax is applied.
See the table below for common wrap sizes to determine how much yardage you will need for the fabric(s) you select. If custom-sizing your wraps, add about 4 inches to each dimension to allow for a good seal. Your fabric will need to be pre-washed so include shrinkage in your fabric estimates.

Beeswax Mixture Ingredients
We recommend starting with grated or ground ingredients when possible because it will facilitate a more even melt.
- Beeswax pellets (100% filtered, cosmetic-grade)
📌 Pro Tip: We prefer pellets but you can also use blocks of beeswax and grate it yourself. Keep in mind that beeswax has a mild odor so make sure the brand you choose has a smell that appeals to you! - Ground pine rosin (100% pure)
📌 Pro Tip: If planning to use the wraps for food, consider a rosin (not resin!) that is labelled specifically for food wraps. - Organic jojoba oil (100% pure)
The table below provides a rough estimate of ingredients needed based on Tana Lawn® yardage (fabric width 52 inches). Keep in mind that type of fabric, thickness of application, and material loss during the process will ultimately affect the amount of beeswax mixture you will need.

NOTE: We trialed several different versions of this beeswax recipe on Tana Lawn® in order to get it just right! We love this recipe but it is also very flexible and can be easily adjusted to your preferred rigidity (beeswax), stickiness (rosin), or pliability (jojoba oil).
Other Project Supplies
- Cutting mat
- Pinking shears or a rotary cutter with a pinking blade
- Ruler
- Digital scale
-
Medium-sized double boiler
📌 Pro Tip: We make a double boiler by nesting a heatproof bowl over a medium-sized pot filled with a couple inches of water. It is important that the bottom of bowl does NOT touch the water in the pot. - Wooden craft stick or spoon
- 2" disposable paint brush
- Large rimmed baking or cookie sheets (2-3)
- Parchment paper
- Heavy duty aluminum foil, extra wide preferred
- Kraft paper, paper bags, or newsprint (to protect your work surface)
- Plastic scraper or an old credit card
- Paper towels or cloth rags
- Oven mitts and trivets
- Method for drying your wraps, such as a drying rack, clothesline, or parchment paper

Step by Step Instructions
Step 1: Reviewing Important Safety Precautions
For this tutorial, being informed, doing some thoughtful planning, and using your commonsense will help to keep you safe. While beeswax is friendly to the environment, keep in mind that it is flammable and must be handled properly. Before working with beeswax, review the following safety precautions.
- Work in a well-ventilated area.
- Use protective equipment and heat-safe tools and equipment.
- Have a fire extinguisher handy.
- Do NOT expose beeswax to open flames as it is flammable - use indirect heat.
- Use of a gas oven is NOT recommended but If you have a gas oven, you can still complete this tutorial. All you need is an iron, an old dish towel, and parchment paper! Don't worry, we will walk you through how to do this.
-
Do NOT leave your beeswax mixture unattended while heating.
- Heat and cool your materials slowly and evenly, especially when glass is involved.
🐝 In other words... Mind your beeswax 🐝
Step 2: Readying Your Workspace
Proper preparation can reduce messes, improve efficiency, and facilitate the clean up process. The more streamlined your process is from start the finish, the more time and material you will conserve.
a) Dress appropriately - wax is difficult to get out of clothing and can leave an oily residue.
b) Clear a large workspace such as a kitchen counter or dining table. Protect the entire surface with kraft paper, paper bags, or newsprint. A non-inked surface will prevent ink from being transferred to the wax or your fabric.
c) Lay a large piece of parchment paper or aluminum foil on your work surface for applying wax to your fabric. Alternatively, you can designate a large, rimmed baking sheet lined with parchment or foil for this task.
d) Keep cleaning supplies such as a plastic scraper, paper towels, and rags handy for drips and accidental spills.
e) Set up a way to dry your completed wax wraps. Use a drying rack, clothesline, or simply lay them on clean parchment paper to dry.
Step 3: Preparing and Cutting Your Fabrics
a) Wash your selected Tana Lawn® fabrics with a mild detergent and dry thoroughly on low heat. Avoid fabric softener. This will allow your beeswax to soak into your fabric.
b) Preheat the iron. Press your fabrics to smooth any wrinkles. Do not use starch or chemicals while ironing.
c) Use the Fabric Requirements Table above to plan your cuts. Again, think about designating different colors or prints for different uses or users. Cut your Tana Lawn® to size using pinking shears or a rotary cutter fitted with a pinking blade. For the latter, make sure the pinking blade moves parallel to but not against your straight edge to avoid damaging your ruler.
📌 Pro Tip: Household items like bowls can help with planning circular shapes.

Step 4: Measuring and Melting Your Wax Materials
There are several ways to heat and apply wax to fabric. For Tana Lawn®, we prefer to melt the beeswax mixture over indirect, low heat, then brush it onto the fabric. While this method may be a little more time-intensive, it results in a more uniform application, prevents over saturation, and conserves wax material.
a) If you have an electric oven, preheat your oven to 200 degrees. A gas oven is NOT recommended for this tutorial because beeswax is flammable!
NOTE: If you have a gas oven, you can still complete this tutorial with an iron, an old dish towel, and parchment paper! We will walk you through that when we get to that step.
b) Use a single piece of foil or parchment to fully cover the bottom and edges of a rimmed baking sheet. This will prevent wax material from seeping through. Preparing two to three large trays will increase your efficiency. Set aside.
c) Estimate the amount of beeswax, rosin, and jojoba oil you will need based on the cut yardage of your wraps (see Beeswax Mixture Ingredients Table above). Remember that estimates in the table are based on Tana Lawn® yardage. We strongly suggest measuring ingredients for no more than 1 yard of material at a time. Ultimately, working in smaller batches is more efficient and allows for better control.
📌 Pro Tip: A small test batch of your wax mixture is a great way to assess the thickness of your wax application and if you like the overall texture and grip of your wraps.
d) Weigh your beeswax and rosin using a digital scale. In a separate container, weigh your jojoba oil. Set these ingredients aside.

e) Prepare your double boiler. We fill a medium-sized pot with 2 inches of water, then nest a heatproof bowl securely on top. If using this method, make sure the bottom of the bowl does NOT touch the water. Melting the wax mixture in a double boiler provides gentle, indirect heat and reduces the risk of fire.

f) Now, place your double boiler on the stove over low to medium heat. Bring the water to a gentle simmer, then adjust the heat so the water continues to simmer but not boil.
CAUTION: If using a heatproof bowl made of glass, slow and even heating and cooling is essential to prevent cracking. Avoid sudden changes of temperature.
g) Carefully pour your wax and rosin into the top portion of your double boiler. Stir constantly with a wooden craft stick or spoon to facilitate melting and prevent your beeswax from scorching. Monitor your wax mixture and adjust the heat as needed. Melting is a S-L-O-W process, especially with more material, and takes longer than you think. Be patient and do not rush the melting process. Large chunks of rosin, in particular, may need to be broken up while stirring to help them to dissolve in the wax.
CAUTION: Do not allow the wax and rosin mixture to bubble or boil, as beeswax is flammable and changes in color and quality with over heating.

h) Once the beeswax and rosin is melted, add the jojoba oil and stir to combine.

i) Turn off the stove and carefully remove the double boiler from the heat. Place the double boiler on your workspace on a heat-resistant surface. Keep your double boiler intact, as the steam from the water in the bottom pot will continue to warm the melted wax in the top.
Step 5: Applying and Finishing Your Wax Wraps
a) It is important to work swiftly and efficiently with melted wax. Place a piece of pinked fabric on your parchment or foil lined work surface. You can also use a prepared baking sheet if you have an extra.
b) Dip your brush in the melted wax. Paint a thin layer of wax systematically onto your fabric, for example, from top to bottom, right to left. It is helpful to use the opposite hand to stabilize your fabric as you paint. Work in small areas until your fabric is covered with wax. To avoid over saturation, minimize the overlap in your brush strokes and do not paint both sides of your fabric.
NOTE: If working with a piece of fabric larger than your baking sheet, apply wax to half of your fabric. Then, fold the unwaxed half of the fabric on top of the waxed portion. Finally, apply a thin layer of wax on the portion of fabric you folded over. If your fabric is still too big for the baking sheet, fold the fabric into quarters but do not apply more wax to avoid over saturating the fabric.
c) Promptly peel your wax painted fabric off of the parchment or foil so the fabric does not get stuck. Either place it on a clean piece of parchment or foil or directly onto a prepared baking sheet. Do not overlap your waxed fabrics on the baking sheet, although larger fabrics can be baked while folded.
NOTE: While you can bake your waxed fabrics on the same pan that you paint them on, we have found that prolonged use of this method over saturates the Tana Lawn® and creates clumps of wax on the wraps.
d) Place the baking sheet with waxed fabric in the oven for about 3 minutes. For folded fabrics, bake for about 1-1/2 minutes then flip it over and bake for another 1-1/2 minutes. Do NOT overbake!
e) While you wait, continue to paint wax on your pinked fabrics, following the same process.
If you have a gas oven, you can accomplish the baking step with an iron, an old dish towel, and parchment paper.
- Preheat your iron to medium (no steam!) and cover a heat-safe surface with a dish towel.
- Sandwich your wax painted wrap between two pieces of parchment paper and place on the towel. The parchment should be about 2 inches longer on all sides of your wrap to prevent wax from getting onto your iron or ironing surface.
- Iron the parchment and fabric, taking care to move the iron around so that it does not stay in one place for too long and burn the wax. As you iron, you will see the wax melting and smoothing out.
- Now, continue with the instructions below.
f) Once baked, take your fabric(s) out of the oven and set the tray on a heat-safe surface. Carefully grab one side of the waxed fabric with your fingers to remove it from the hot tray. The wax wrap must be promptly removed from the baking sheet to prevent it from hardening and sticking. Wave the fabric back and forth in the air to facilitate the cooling of the wax. You will feel the fabric start to get more stiff as the wax hardens.

📌 Pro Tip: To get wax residue off of your hands, add a few drops of jojoba oil and gently rub your hands together. The wax (and oil) will wipe off with a paper towel.
g) Lay your cooled beeswax wrap(s) on a drying rack, clothesline, or parchment paper.

h) Monitor the thickness of the wax on your finished wraps. If you have clumps of wax, you can scrape off the high spots and put the wrap in the oven again. If the wax on the entire wrap is too thick, warm the wrap in the oven. When it comes out of the oven, promptly lay a fresh piece of pinked fabric on top to soak up the excess wax. Dry as usual and retouch the soaking fabric with wax to ultimately create a new wrap.
i) Repeat until all of your wraps are done or until your wax mixture starts to separate or solidify. To reheat your wax mixture, it is safest to cool both portions of the double boiler to room temperature before proceeding, especially when working with heatproof glass. Follow the same process we used to melt the beeswax mixture above.
📌 Pro Tip: You can adjust your technique or ingredients for future batches once you assess your finished product. Keep in mind that beeswax lends rigidity, rosin provides tackiness, and jojoba oil adds flexibility.
j) Do NOT pour wax down the drain, as it will clog your pipes! Cooled, solidified wax can be stored in a freezer bag or glass jar for future use or composted. Make sure the wax is fully cooled before storing. Keep the wax mixture in a cool, dry place away from direct sunlight or heat.
The Do's and Don'ts of Beeswax Wraps
DO separate wraps for different usages - Color coding or thematically separating your wraps by family member, food group, or task is a great way to stay organized and avoid transferring smells and flavors, as fabric naturally absorbs some odors.
DO handle with clean hands - Wash your hands before handling your wraps.
DON'T expose to heat - Heat can damage beeswax coating. Do not clean your wraps with hot water or leave them in the sun or a hot car. Wraps should not be microwaved or heated in the oven. Also, make sure containers have cooled before wrapping.
DON'T place raw meat, fish, or eggs directly on wraps - Raw items like meat, fish, and eggs should not come in direct contact with your wraps, since wraps cannot be properly sanitized with hot water and soap. However, you can place these raw items in bowls covered with a beeswax wrap, as long as the wrap isn't touching the contents of the bowl.
DO use in the fridge and in the freezer (short-term) - Beeswax wraps are great for refrigerated foods but only suitable for short-term freezer storage. Fabric is breathable so foods in the freezer are subject to freezer burn after a few weeks time. While beeswax becomes noticeable stiffer in the cold, you can soften your wraps by letting them thaw at room temperature or using the warmth of your hands to make it more pliable.
DON'T store wet or liquidy items within wraps - Beeswax wraps will degrade quickly with exposure to liquid. Instead, place liquids in a glass or jar before wrapping.
Cleaning, Storing, and Refreshing Your Beeswax Wraps
Although beeswax has natural antimicrobial properties, wraps should be rinsed or washed periodically but not necessarily after every use. We recommend the following to prolong the life of your wraps.
- Rinse using cold or lukewarm water. Do not soak.
- Remove stubborn stains and residue using a mild dish soap (no harsh chemicals!) and soft sponge. Do not scrub the wax coating. Rinse with cold or lukewarm water.
- Once cleaned, place your wrap on a dish rack or clothesline to dry completely. Do not wring it out!
- Store wraps folded or rolled. While some people like to put their wraps on the counter for ease of access, we recommend storing them in a cabinet or drawer where they will be protected from dust and other particulates. Avoid areas with direct sunlight or heat.
- To refresh your wraps, add some shavings of your beeswax mixture to areas that may have lost their stickiness and iron it on medium heat between two pieces of parchment. To avoid wax mishaps, cover your ironing surface with an old dish towel and cut your parchment paper so that it is a couple inches bigger than your wrap on all sides.
Bee-ing green never looked so good!


Comments
Amber Dugger says:
Wow! I love this idea! I use beeswax candles and always save the bottoms to reuse for other candles. I might just chop this up and use it for this instead!
Naomi says:
Thank You!! I have wanted to do this!! Now I can!!